 I can't help but be partial to this post because this was my favorite creation for my niece and nephew-in-law, Amanda and Eddie, for their wedding.
I haven't been quilting long, but since I started, I realize a quilt is a reflection of a commitment. From selecting fabrics, a pattern, time spent cutting, sewing, quilting, binding and being willing to correct mistakes along the way. Doing all of these things while pouring out love for the recipient during each minute you spend on it.
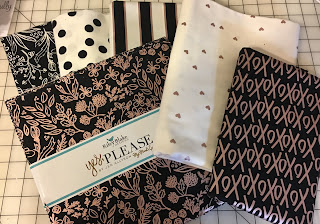
I asked Amanda's family the colors of her home. From what I remember when I visited, the main color was mauve and I knew she liked a little bling. I showed the next two pictures to her mother who said it was a good match.
I scoured the internet for this Riley Blake design(one of my favorite fabric designers and manufacturers). For many weeks I was getting nervous because I was beginning to think I could not find enough of what I needed for the quilt. I finally found what I needed from many different websites. That's my Type A personality: do what you need to, to find what you want and don't give up. More than less, of the time, this works.
The pattern I used was one I had made before and enjoyed making: Lost in Love: Lost and Found Love. You can find the pattern here.
I began by cutting and ironing Heat and Bond Lite to the 10" squares used for the hearts.
My Cricut Maker is an incredible tool to cut out these hearts perfectly.
I ironed them on to the remaining 10" squares. This step took some planning.
I decided to use a blanket stitch to stitch around each heart.
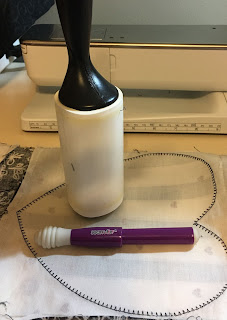
Notice the seam ripper? The first round of stitches did not live up to my Type A, so I removed every single one of the stitches around every single heart and stitched each one again.

The lint roller is a great hack for picking up removed threads via the seam ripper.
I created a placement for each heart.
Added borders and sewed them together.
During my Saturday afternoon visits to Shirley's, I was able to finish the borders, batting and backing.
Charlie likes to help whenever he can. He looks like he's taking a poop here, but I assure you he is not! LOL
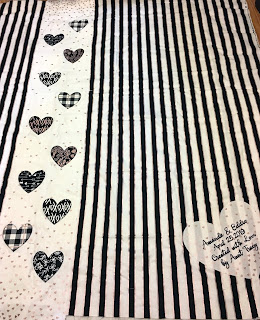
I like to make the backing of my quilts a little more interesting than just plain fabric. For this, I chose to make smaller hearts, fuse them to a panel and blanket stitch around them.
The heart in the bottom right corner is to embroider the date.
 |
At one point at Shirley's, I was about to have a meltdown. I made a huge mistake in cutting the striped fabric for the backing. Shirley helped me figure it out so you can't even tell. Can you see the mistake I made? If you do, comment below with what you think it is.
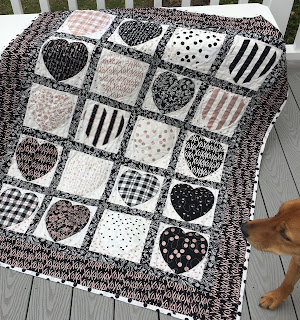
Photos of the finished quilt below.
He says, " It's a hit and ready to be delivered. Woof."
I always include a care tag on each of my quilts. I hope this helps the recipient prolong the longevity of the quilt.
Lessons Learned:
1. I am still really bad a making correct measurements for the backing of my quilts. I need to remind myself that every mistake equals a chance to learn.
2. I will not deliver a quilt that I am not 100% happy with.
3. Without Shirley's help, I'm not sure I would have made it through the creation of this quilt. Although I only visit her in the doldrums of winter during Feb and Mar, she is willing to help me with my quandaries at any time during the year. It pays to have a mentor to help you through your times of stress.
4. Don't be afraid to ask for help. Find an expert locally or online to help you.
5. I made this quilt in NY when the snow flies. I wish I took some pictures of the quilt in the south next to the sunny beach.
I'd love to hear about your quilting experiences. Feel free to comment.
Create happily,


No comments:
Post a Comment