

Recycled Tee Project One: Swiffer Dry Mop Cover
A couple of years ago I came across a tutorial on Pinterest on how to make reusable Swiffer covers. Knowing how expensive the sheets are to buy, I set out to make a few of them and I've used them ever since. I used the family's old t-shirts that I was going to throw out because they had stains on. Creating these was a much better use than throwing them away. Click here for a very simple tutorial you can use to make them.Recycled Tee Project Two: Dusting Cloths
Lay an old tee shirt out flat and cut out two equal sizes of the the shape you would like. I used an old ribbed cotton tank top for this project. I've made them out of smooth cotton shirts as well. Sew the two pieces together about 1/4 inch away from the edge. Leave an opening of about 3 -4 inches.
Turn the fabric right side out and pin the opening closed.
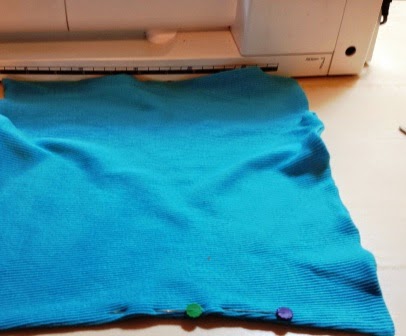
Top stitch around the shape you created close to the edge catching both sides when sewing over the opening

Use the decorative stitches on your machine to sew through both layers of fabric to keep it secure in the middle.


Recycled Tee Project Three: Dusters Covers
I found a simple tutorial to get started creating the duster. You can find it here. I used a plain, smooth, old cotton shirt for this project.

I started by cutting out 2, 8x8 pieces of fabric and 2, 4x6 pieces.

I used an upside down small glass bowl and small glass as a template to round the corners of all pieces.

Next, place the small piece on the bottom, place the two larger pieces on that, then place the second small piece on top. Pin through all layers of the fabric. Measure and mark a center line. Sew the marked line removing pins as you go.

Fold the top and bottom pieces to the right along the stitched line. Place the swiffer on the fabric and mark the width of the left side of the swiffer. Sew from the bottom of the duster up to the end of the small piece curving around the top. Pivot the fabric around the needle, fold the small pieces to the other side then sew down the right side of the center seam, with the same width as you did on the left side.

When finished sewing the channels for the handle, lay the fabric layers flat. Using a rotary cutter or shears, cut strips about 1/2" wide to create the "dusting fingers". Be careful not to cut any of your previous stitching.

When finished, slide it onto the handle and look out dust! When they are dirty, throw them in the wash with a load of towels. They'll be good as new the next time you use them.

Can you imagine the money you will save if you made a few of these? I love them.
Lessons learned:
1. I'm going to try to make the dry mop covers and dusters out of scraps of fleece I have. I think the fibers in the fleece fabric would work well for these projects.
2. Since I created the duster, I've found another tutorial I might try next time. We shall see which one I like better.
Happy Cleaning!
