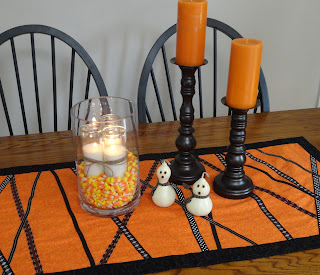
 I've been itching to make this Halloween table runner since I pinned it on Pinterest months ago. I believe it was my very first holiday pin and one the first sewing pins. As I pinned it, I thought to myself, " this will be a piece of cake." The original blog post can be found here. I like it because it seems to have more a classy, spidery look to it than the traditional Halloween fabrics of ghouls, goblins, pumpkins and candy.
 I finally started it about 4 weeks ago. With school starting, there is just so little time to make what I want to. I'm reminded during this busy time of year of a book from Nancy Zieman called 10,20, 30 Minutes to Sew. If I can spend a few minutes, a few times a week on a project, it will eventually get done.
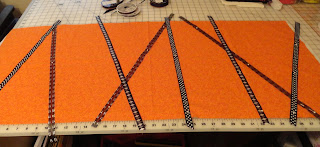
After a number of ripped out stitches and wondering about borders and bindings, I finally finished it last weekend. One of the major hurdles I had was sewing on the ribbon. No matter how hard I worked at it, either the ribbon or fabric seemed to stretch and pull every which way. I tried the tip on the original website of using Steam a Seam fusing but it was a MESS!!! I was about to chalk this project up to a Halloween trick when I decided to give it one more try by using a walking foot to attach the ribbon. What a treat! From then on the project was on it's way to my dining table.
I chose a slightly darker border than the original. I didn't want to do a traditional quilt binding so I choose a new technique of mitering the corners. I will definitely use it again because it was that easy.
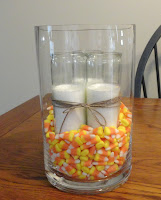
 I lost every last Halloween decoration I had during the flood of last August so it's time to make more. I used a large glass cylinder shaped container to make a candle centerpiece. I purchased three tall , thin cylinders in the dollar store and wrapped them together with twine. After placing them in the larger container, I filled in with candy corn. When lit, the candles have dimension and sparkle.
I also found a pair of pillar candle holders on the clearance rack a Michael's over the summer. I sprayed them with Oil Rubbed Bronze Rustoleum paint, the same as I used on the handles of the kitchen cupboards. (I sprayed a number of items with this paint. I love it. ) With a couple of orange and black glittered candles (coming soon) from The Christmas Tree shop, the pillar holders look brand new.
One of my favorite groups of candles are these mason mummies! They were so simple and easy to make. Just grab a few different size jars, some glue, a couple rolls of first aid gauze wrap and some movable eye. They took very little time to make and the effect in the dark is a cool ghoulish glow.
Happy Halloween Everyone!
Lessons learned:
Table Runner - Go out and buy yourself a walking foot. They are indispensable.
I chose not to use any kind of stabilizer in this runner. I think next time I will so it has a bit more shape.
Pillar Candle Holders - Be mindful of paint drips. Sometimes I'm in such a hurry, I don't pay attention to those kind of details.
Mummy Candles - I used hot glue. Next time I make them I'll use Modpodge or good ole' Elmer's.


