

The start of the school year means a slow down of the creative process. At the end of each summer I
say, "No matter what, I'm going to sew as much as I can during the school year. " Well that never seems to pan out. So here we are at the beginning of another school year meaning less blog posts until vacation time. :( I'll blog when I can, but I can't promise anything. Those of you who are school teachers will understand completely.
As the weather cools down here in the northeast it's time to dust of the decor of the season or in my case put out the ones I created this past summer. Although I finished them weeks ago, I've been waiting until the "season" to post the finished products.
This first one is a pattern from Joined at the Hip which I've had for many years. I love their patterns and when (if) I retire I'll make more. I decided this was the year to finally make this particular wall hanging.
I love the bright Halloween colors, especially the purple and burgundy. I can't tell you where the fabric is from, except from my halloween stash.
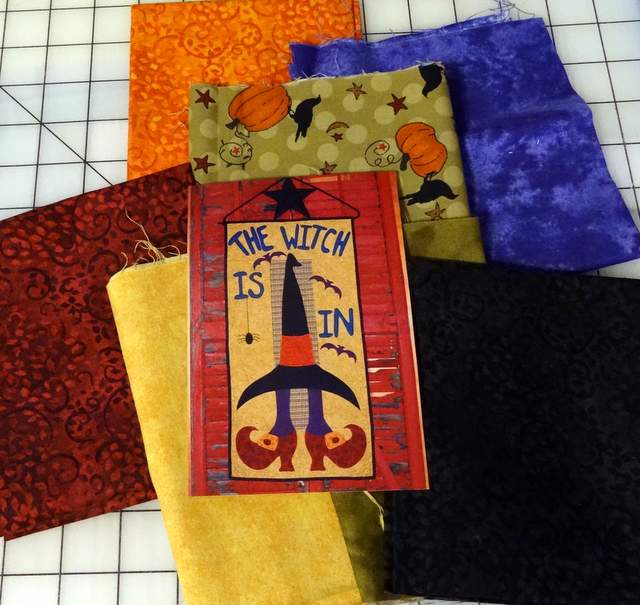


The photos were as much fun to make as the wall hanging.
I machine appliqued as directed on the pattern. 


Here's a sneak peek at another special Halloween DIY coming in the next couple of weeks.

Lessons Learned:
1. When using the cricut, don't use the ultrabond Heat n'Bond. A lighter weight will do just fine.
2. The first few letters were appliqued without any problem. As I continued, I became more and more frustrated because the tension seemed to go way off. I just had to stop. I took apart my machine, cleaned and oiled it, put it back together and the applique went much smoother. Listen to your machine!
3. I'm not really happy with the bright orange applique around the hat band. But, Oh Well, it's too late. Next time I'll try to pick a more neutral color.
Do you have a favorite halloween wallhanging or DIY decor?
Thanks for visiting This and That from One Twenty Seven.

This post is partying with:


So happy to have this project shared by Lindsey at Fort Worth Fabric Studio @ http://fortworthfabricstudio.blogspot.com/2015/09/fabric-frenzy-friday-features_27.html