Tuesday, July 28, 2015

Quilt as You Go Halloween Coasters

I've become fascinated by the quilt as you go (QAG) method for making small items like bags, table toppers, etc. Someday I'll try a larger quilt project by piecing QAG blocks, but for now, small and simple is the best place to start. 

In just about every quilting project I've read about or viewed on YouTube, I heard so many times, "Save your scraps!" I think, "I'm not going to save all the scraps because I don't have an inch left in my sewing/office space to store them."  

So I've compromised. After finishing up a larger project, I'm sold on saving "some" scraps. These coasters were so easy with the QAG method: it took hardly any time at all. To make it even easier, I used Bosal Double Sided Fusible Foam instead of batting.  I first heard about the foam from one of the Missouri Star Quilt Co. videos and tried in vain to order it online. I finally found one and soon after many vendors were selling it.  All you need for this project is scraps, foam and some fabric for the backing. 
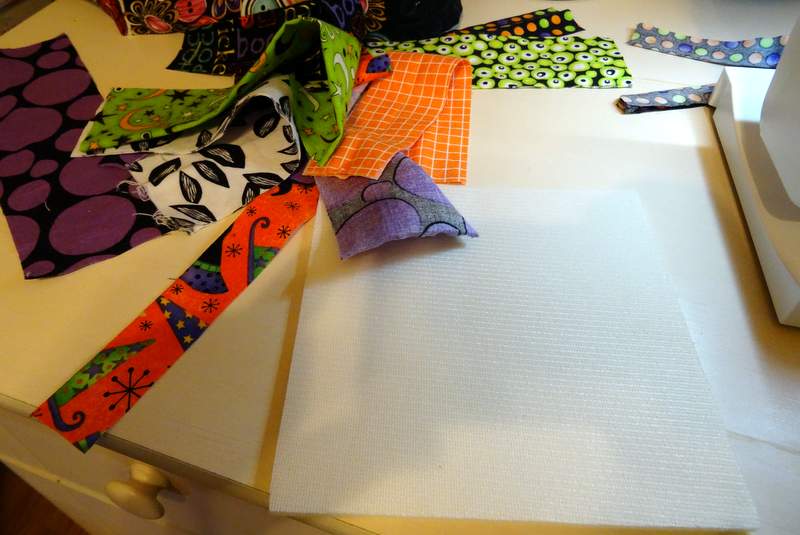
I cut squares of foam the size I wanted for coasters. Start by sewing a square, or any size fabric anywhere on the piece of foam. Go ahead and sew some quilt lines through them if you want to.  I've finger pressed these small pieces. 

Here is a view of the back of the foam. 
You can add pieces wherever you want to. It doesn't have to be going around the initial piece. That's what is so great about QAG and using the scraps you have.  
When finished, go ahead and press what you have quilted to the foam. You should notice a difference right away in the stability of the coaster. 
Another view of the back.
Next, square the coaster up by cutting the shape of the foam. In this case a square.

Cut a piece of fabric the size of the square and sew it right sides together with the QAG piece.
Be sure to leave an opening so you can flip it right side out.
Press the back side of the fabric to the foam and hand stitch the opening.
Voila!
I can't wait to make more of these little goodies. How about you? Have you ever made a Quilt as You Go Project? Have you ever used the Bosal Foam? 

Lesson's Learned: 
1.There are no rules for QAG. Have fun and be creative. 

Have fun, 
By the way, here's preview of coming Trick or Treat attractions: 

Thank you Lindsey for sharing this post on your blog!

This post is linked to two of my new favorites: 

Wednesday, July 15, 2015

Easy Peasy DIY L Shelves


This post is in honor of my husband and the great work hes' done to showcase my photos in our current house. Not an easy task, according to him. In fact, I often hear him say, " It's not easy being me." lol


Many of my FB friends know that my profile  picture is one of my favorite cartoons, Snoopy. I think I'm going to  have to start using the one below as an ode to my husband Rich for the carpentry work he does to make me happy. What do you think?
As you can see, the hallway of our house of four years is pretty bare. I was able selvedge my kids caricatures after the flood and they are on the opposite wall, but the wall you see is pretty lonely.
His latest project is that of these great shelves I found at Shanty to Chic.  Seriously, these shelves cost just $9.87 plus the cost of finish screws. We bought 2  2x4x8 pieces of primed MDF board and 1 2 x 2 x 8. He made one 4',one 3' and one 1' shelf.  Pretty thrifty huh? 
A month before Irene , four years ago, with the help of my sister I had just finished a gallery wall of about 20 photos of my children.  We had just finished painting the living room and installing a new wood floor. I decided a gallery wall would be perfect above the sofa. It was a painstakingly slow process but it looked great. The only regret I have is that I didn't take any pictures. The other problem I know realize is there was so many nail  holes in that wall. 
In our  current home, I didn't want to have all the nail holes.  I saw the shelves on Pinterest and decided this is the way to go. After nagging and nagging (you know how it goes ladies) we finally went to Home Depot, picked up the boards and he got busy. 
 I had only a few photos I was able to salvage  from the flood and here they are. I love how the shelves allow you to layer photos and memorabilia.
With the extra 1 foot of shelving, Rich build a charging shelve for my iPhone, camera, and iPad. I love it.

I (he) will be building more for a wall in our dining area.  Stay tuned for the outcome of that project with an addition to the wall space in both the dining area and hallway. 

Lessons Learned: 
1. We chose a primed MDF board for this project. For the first go around it was OK. But for the next, we will go with a pine board. The MDF shows too many imperfections. 
2. Our hallway is narrow. The original plans called for the base of the shelves to be 1x4. Rich cut them down to 1x3. They didn't stick out as far in the hallway. 
3. Looks like I need more length on my charging station shelf. 

Do any of you have experience with building these shelves?  I'd love to hear about your experience. 
This post is linked to: 

Bicycle Built for Necessity

Summer is meant for creativity after I've rode my bike and walked. However, for a couple of years now I've been meaning to make a bicycle bag to carry  my stuff: mail ( if I have to), iphone (to listen to books), keys (if needed), and a variety of whatever else needs to go on the trip.   I thought about a basket, but that seemed to juvenile and too big. This year I finally decided to take the plunge and see what I could come up with.

I found this really cute bicycle fabric on Etsy. I  am also in love with the Basal double sided fusible foam. I saw this on a video with Jenny and the Crafty Gemini when they showed how to make a quilt as you go bag. I hope to have one of these made by the end of the summer and posted here.

Thanks to Missouri Star Quilt Co. I was able to purchase to Basal Foam as part of their daily deals. I highly recommend signing up for  those deals. However, be warned fellow sewers, it is very dangerous. :)  I bought one (actually many)  to make the bag (sometime in the future) and one to cut into pieces for other projects. I hope to show you some coasters in the future as well.

This tutorial may not be the best because I was really flying by the seat of my pants, or rather the seat of my bicycle seat. I  didn't have a true pattern, just improvised a lot.  The basic idea for the bag came from  this make up bag tutorial at Sew Like My Mom. There wasn't much needed except for some fabric, foam, a zipper and I decided to add some rick rack.  Check with the tutorial for much more detailed directions.

I measured the area of my bike I could fit in a bag. I wanted a bag that faced me as I ride, not facing the front as a basket would.  I doubled the size of the foam and fabric adding an extra 1/2 inch to the fabric.  I cut a piece for the lining as well as the outside. 


Then sewed the outer fabric and lining to the first half of the zipper.  Before sewing the second half, I added some rick rack for a visual effect. 


Once the zipper was sewn on both sides, I turned it inside out in order to sew both sides.  I started with a full length of the zipper and only cut it when I sewed the sides. At the point of sewing across the zipper, I made sure to reinforce the area by going back and forth a few times. 

After each side was sewn, I used pinking shears to trim away the extra fabric.  
I then made a standard "box"  on the bottom of the bag to give it some dimension. I trimmed again with pinking shears.  


After both sides were sewn, I turned it right side out. It's finally looking as I expected.
Now this is kind of hard to see: the two pins with a white head are where I planned to devise straps to anchor it to my bike. You can see it is not symmetrical at all.  I also carry a water bottle on the bike which my husband moved from facing me on the bike to facing outward. The only way I can attach this bag is in the positions of where the pins are.  So here is what I did: 
I added a very think tie strap to the far left of the bag. 
And a velcro strap to the left.  
 
I tacked both on by hand sewing them to the outside on the back.  

For today it seems to work out well. The straps are positioned  perfectly in order to have my water bottle holder too.
I'm able to fit some mail, my keys, my iPhone in the bag with room enough for more if I need it.


I'm glad to have this bag done. Tomorrow will be my first outing with the new accessory for my necessities. I think it's going to work out great. 

Lessons Learned: 

1. Be mindful of using one way designs  on fabric. If I showed you the side of the bag that is facing the front, the bicycles would be upside down.  You can see this if you look at the photo where I was attaching the straps that would hold it to the bike. 

Do you have a necessity you just had to make that  you couldn't find just the right one in the store? Feel free to share your experience in the comments below. 
Happy Bicycling Everyone. 
This post is linked to: