Friday, July 26, 2013

A Colorful, Quilted, Carryall

Two years ago while on vacation in Ogunquit, ME, I finally decided to go into Portsmouth NH and look around. Rich is a "let's get to where we're going" kind of guy and doesn't like to explore the detours. So while he was doing the shake and bake on the beach, I went exploring and found my new favorite fabric shop  -  The Portsmouth Fabric Company.  The shop is in an old brick building and doesn't look like much from the outside, but has lots of New England charm. The reason I love it so is because it is so full of color and you can't help but be happy when you walk in the door. You will find yards and yards of popular designer fabrics including Amy Butler and Kaffe Fassett. If you love fabric like I do, you could spend hours and hours here.

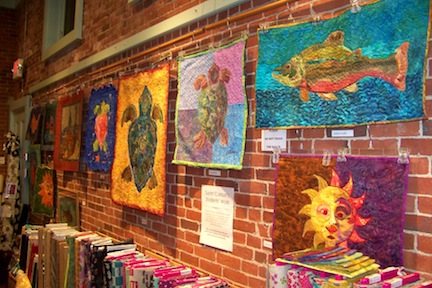
I couldn't leave without buying some of the great fabric, so I purchased a jelly roll and some fat quarters  from some of Kaffe Fassett's blue fabric collection.  I knew I probably wouldn't get to making a quilt right away so I settled for a summer bag pattern I'd seen in the store called "The Weekender".   Here is photo of the bag from the shop someone else made in different colors than what I chose.


Soooo, after two years of having the fabric, I got to work on the project. Here are the jelly roll strips and pattern.


I cut and pieced the fabric together, made the handles and button loop. After the piecing was finished and batting added to the main bag pieces,  I quilted the main parts with an "in the ditch" feather stitch. If you look at the right side of the photo on the right below you can see the stitch.  


I decided to make a couple of changes to the bag. The first on the handles. I decided to roll the middle of the handles and stitch the sides together. Isn't this how they end up anyway after you've carried the bag for awhile?


And just so you know, I made my share of mistakes while making this bag, the proof is in the picture below.

The last part of the bag was to create a bottom which was very easy. I ducked taped some cardboard together and made a sleeve of fabric. Into the bag it went.


Here is the finished bag.  I like the roominess of the bag because I tend to put everything in there, even folders, books and papers if I have them.


Lesson's Learned:

1. Be sure you have enough fabric to complete the project you decided on. There were plenty of strips in the jelly roll I purchased, but some of them I just didn't like. I used some solid fabric from fat quarters to make the handles and put a pocket on the front.  I'm not sure if I like the pocket or not, the jury is still out on that.

2. I had to piece each individual 5" piece together. I think their must be an easier way to put the pieces together. I'm still researching that one.

3. Explore the roads off the main drag, you'll never know what you'll find!


So what do you think? Have you ever made a fabric bag? I'd love to hear your comments.

Have a great weekend,


Sunday, July 21, 2013

Chirping Away - Part 2

I finally got the Cricut out that I've had for about 3 months  about a week ago. I started by creating some simple paper labels and Mod Podging them to paper covered containers.

I couldn't wait to try the vinyl that everyone raves about. My friend Kathleen at Projects at the Picketts, posted some cute door signs that she created. These really kick started my ambition to get going with this.


I purchased a roll of vinyl from Amazon.com. It was much cheaper than those a Micheal's or JoAnn's. Every once in awhile these stores have a 40% coupon and you might be able to get it at a good price. It pays to shop around.


I eventually want to do something similar to what Kathleen did, but my first attempt at cutting vinyl was, again, a simple label for my recipe binder. I'll post a "Part 3" when I do the fancy vinyl wall decor.

This is just Soooooo Coooooool!


I learned from Kathleen's blog she can purchase single images of what she wants for her Silhouette which is much cheaper than an entire cartridge that Cricut offers. After more research I learned you can do the same with the Cricut, but the single designs are very limited at this time.
I soon found out that Cricut has a computer program that allows you to create your design on a virtual cutting mat and with a press of a button (not on the actual machine, but on the computer) it will begin to cut your design. I LOVE IT!

My second label was a correction from Part 1 - I spelled "cartridges" correctly and placed it on my cartridge container I made.

My next vinyl creation was a wall design to jazz up the area where I store my Cricut and accessories: a simple mirrored flower design between the two shelves.   The design It was a little tricky to remove the intricut parts of the design , but all in all it was pretty easy to follow all the step and place on the wall.  I wasn't to sure of how to use the transfer tape, but as soon as I read the directions, it was a breeze.

Awhile back I glued flower buttons on push pins for the cork board in my "office". I thought it would pretty neat to add a few buttons to this design on the wall. What do you think?


Below is a picture of my Cricut's living quarters. I think it will be happy there when I'm not putting it to work.


Before Irene came to visit us in Schoharie, I had a Sizzix die cut machine with many,many die. At the time I bought it I did choose it over the Cricut, not fully understanding what the Cricut could do. Since Irene took the Sizzix with her, I've been missing what it could do and decided on the Cricut this time. And boy I am glad I did!

I wonder if other people who have a Cricut  or similar machine have the same reaction when they start using it?  What was your reaction?

I'm off to start the chirping again.

Saturday, July 20, 2013

The Cricut Finally Chirped - Part 1

With work at school as hectic as it is, I haven't had time to unpack and start using the Cricut I purchased on Amazon. It was a really great deal, one I just couldn't pass up. ;)  I've been gathering some ideas for using it on Pinterest and researching cartridges that I could get the most bang for my buck. While researching, my friend Kathleen, over at Projects at the Pickett's just started posting some projects she's started making with her Silhouette. I didn't even know there was a machine out there similar to the Cricut. After enjoying her posts I quickly figured out there was and I was going to get some great ideas from her as well.  I also found some much needed "get up and go" to start using this machine.

Last week I finally did it! Unpacked it, found a storage place, and decided on an easy (or what I thought was an easy) first project.  The reason I invested in the Cricut was to use it for some of those fun vinyl labels and sayings that seem to be popular. However, I decided to start by cutting paper for the first time through.  

I've been collecting various containers to cover with either paper or fabric. I like the fabric covered boxes, but I wanted to start labeling the boxes, which thought would work better with paper. So out came the containers, paper, Mod Podge and Cricut. 

I began by covering some containers fully. On a couple of the plastic containers I had  I just added some sections of paper . Once I finished, the Cricut went to work. I had no idea how easy it was to use.  After deciding what I was going to label the boxes with and the designs were cut, I Mod Podged them to the containers. 


These were some of the containers I know have for decorative storage.


 I like them a lot better than plain solid color boxes.


My Cricut and accessories have a couple of shelves they call home in my "office." You'll see this again in part 2.  

 I even labeled and Mod Podged a soap container that can now be refilled and reused.


And look who was watching me? Yes, this is our dog, Beasley. He has some anxiety issues an likes to be in the bath tub. Go figure... 


Lessons learned: 

1.  Use the correct Mod Podge for the material you are using it on. Although you can't really tell, the Mod Podge on the soap container dried a bit cloudy. I think there is one that would dry clear on plastic or glass. I'll have to see if I can't find it for next time. 

2. I need to learn how to spell "cartridges". 

Do you have any great ideas for using the Cricut or Silhouette? I'd love to hear about them.  

Sunday, July 14, 2013

Let There Be Light (but not too much)

Rich is fascinated by those outdoor LED lights. He has them in the garden, on the deck; and if I let him, he'd have them everywhere.

Yesterday morning I made the mistake of showing something kind of cool looking that Gina Crook pinned on Pinterest: this set of 4 lights set into landscape timbers.


Well that did it. We were on our way to Kelly Farm and Garden and picked up all the materials to make the light post.


The post were cut various heights and drilled the size of the light cylinders.


Rich then stained the posts using a stain and poly blend.


After securing the four main posts to one in the middle and adding the lights, by Sunday afternoon we had a nice display for our deck.


And here they are at night. 


I think the flash was a little to bright for the fourth light in the first picture. It took a long time for these to light up. And weren't we lucky enough to get lights that change colors if we want. 

Nice work Rich, just don't get carried away. 

Have a great night, 

Monday, July 8, 2013

Family, Trucks, Country and PicMonkey

Sometimes you just can't help but love the place you've chosen to live. Some might say we are silly
for living in the country, but how can you not love this view?  It always amazes me to see the landscape and colors changing before your eyes as the seasons pass.


I know some of you recognize the view below. This is quite a different view than what you may have seen. Some of you may even have been lucky enough to climb to the top of  Vroman's Nose and look down on the acres and acres of produce fields in this rich valley.


Rays of light behind Vroman's Nose added with PicMonkey
Yesterday while at a family get together we decided to have an impromptu photo shoot with the family and their vehicles. Why yes, of course, in the country we have to have TRUCKS. And not just any trucks , mind you, they have to be diesel and must be a Ford or a Chevy.

Photo by Kelly M.  - unedited
So here's my crazy family and their significant others having fun in the country with their trucks.  But who , or what, is PicMonkey? Well PicMonkey is an online photo editing tool that I've been fooling around with for awhile. I like to have the tools to edit and be creative with photos, but I don't have Photoshop or any of the expensive software. PicMonkey is free but also provides additional features if you choose to pay for an upgrade.  After using the free version for awhile, I chose to splurge and purchase one month of the full upgrade. I'm not quite sure yet if I'll even use all the cool features. We'll have to wait and see. 

So here are some of the photos and creative edits you can make with PicMonkey.  Most have been color optimized due to a very hazy night; not the best for taking photos. 
Uncle Dave and Cousins -  Lindsay, Austin, Cody

So you expected all boys, right?  Well the youngest here, just traded her first car in for her own diesel not to long ago. Pretty cool huh?

A bit more blue was added in the sky on this one. 

Notice the spotlight in the middle of this one. 

Black and white are always in style. 

This is an actual haze effect. 


The two above were actually cropped from one photo. 
A fun frame, one of many. 

This is my favorite - the effect is called Urban Glow. 

You can also create collages of the individual photos you took.

As I peruse through Pinterest, I see many of the bloggers use PicMonkey to make labels and all kinds of crafty paper goods for the home. I plan on using it to make labels for my classroom in the fall. 

Do you have a favorite photo editing program you like to use?  Please share by leaving a comment or just let me know what you think. 

Now  was that "country" or what? 

Enjoy,